Cabinet Painting Sacramento can be a time-consuming and labor-intensive project. It requires removing doors and drawers, sanding, priming, and painting.
Start by taking one of your cabinet doors or drawers to the hardware store for a color match. A satin or semi-gloss paint is best for cabinets since it stands up to cleaning and hides imperfections better than a glossy finish.
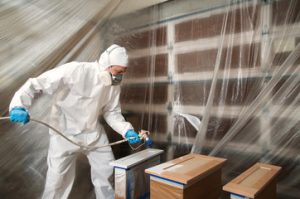
If the surface of a metal part has become worn, pitted, damaged or infested with rust and other contaminants, it requires proper preparation before coating. Depending on the application, this can involve a variety of techniques, such as mechanical abrasion, chemical treatments, or even flame blasting. When done properly, these steps ensure that the new coatings, adhesives, welds and assembles will hold up well to a range of conditions and applications.
The first step in any cabinet painting project is to clean the surfaces. This includes the inside and outside of all cabinets, as well as any doors, drawers or other panels. It is important to remove any cooking grease splatter, as paint does not bond well with oil. It is also a good idea to use a degreaser, like paint thinner, on any surfaces that will come into contact with food or cooking oils. Cabinets above stoves or sinks are particularly susceptible to this, but all of the surfaces should be cleaned thoroughly.
Next, sand the cabinet boxes, doors and drawers with a medium grit sandpaper to smooth any wood filler or imperfections in the surface. This will create a bit of an adhesion profile and give the new finish something to adhere to. Be sure to wipe away all sanding dust with a tack cloth before continuing. This will make the job easier and keep the sanding dust out of your food prep area.
It is important to note that any type of cleaning or abrasive technique will generate dust and residual particles that must be wiped away or rinsed off the surface. This is crucial because any residue left behind can interfere with the effectiveness of fresh coatings and adhesives. It is also necessary to capture, treat and dispose of any wastewater generated during the process.
Fortunately, modern power tools have been designed to achieve a high standard of surface preparation with near-zero waste. This makes them a cost-effective and environmentally friendly alternative to traditional methods. They can be used to clean and resurface ferrous and nonferrous metals, and also provide the surface profile required for effective anti-corrosion coatings. They are also ideal for preparing surfaces that require conditioning with methods such as chemical treatment or mechanical abrasion.
Primer
Cabinet painting requires more work and expertise than just brushing on a coat of paint, which is why it’s usually left to professionals. But if you’re willing to put in the effort, it can make a huge difference in your kitchen. Here’s everything you need to know about the process, from selecting the right products to preparing your cabinets for painting.
The first step is to clean the cabinets thoroughly with a degreaser. This will remove grease, oil, and other contaminants that can interfere with the bond between the primer or paint and the cabinet surface. If you don’t remove these contaminants, they may bleed through the finish and damage the cabinets over time.
Once the cabinets are clean, you can use a scuff sandpaper to lightly roughen the surfaces. This will help improve adhesion and make sure the new paint will look smooth. Once the scuffing is complete, you can use a tack cloth to remove any dust and dirt that was left behind.
Next, you’ll need to apply a coat of primer. There are several different types of primers available, so choose one that’s compatible with the type of paint you plan to use. Stain-blocking primers are effective at hiding stains and preventing them from bleeding through the topcoat, but they’re typically more expensive than adhesion primers.
If you’re using an alkyd-based paint, apply two coats of primer before starting the final finish. This is the best option for durability, and it’s also easier to clean up than water-based paint. The only downside is that it can take a while for the primer to dry, so you’ll need to plan accordingly.
The final stage in the cabinet painting process is to sand with 220-grit sandpaper. This will remove any smears or drips and give you a smooth, even surface to apply your finish to. Once again, it’s important to sand lightly so you don’t sand off all your hard work. Then you’re ready to enjoy your newly-painted cabinets!
Paint
Cabinet painting is a cost-effective and DIY-friendly way to transform your kitchen or bathroom cabinets. But, there are many factors to consider before deciding whether it’s the best option for your space.
The type of paint used for cabinet painting is a big decision. Oil-based paints provide good adhesion and durability to a wood surface. However, they dry slowly and emit strong odors. Water-based paints are quicker to dry and emit fewer fumes, but they’re not as durable.
Acrylic paints are durable and easy to apply. They’re also easy to clean and resistant to fading over time. It’s best to use a primer before applying an acrylic coat of paint, as it helps it stick well to the wood.
There are a number of different stain blocking primers that work well on different surfaces. If your cabinets have significant stains, an oil-based primer may be best. Otherwise, a water-based primer will help the new coat of paint last.
If you’re choosing to reface instead of paint your cabinets, it’s important to make sure the wood is in good condition. Then, choose a quality veneer that matches the style of your home and suits your preferences.
Refacing is more expensive than painting, but it can add up to a bigger visual impact and longer-lasting results. It’s also more labor intensive, and it can be difficult to match the look of the refacing to existing hardware.
Choosing the Right Cabinet Paint
When it comes to cabinet painting, there is a lot of information out there about what steps are required, what type of paint to use, and whether or not DIY cabinet painting will hold up over time. But, with a little know-how and the help of an experienced Handyman professional, you can achieve beautiful results that will last for years to come.
If you’re thinking about upgrading your kitchen, give us a call! We can provide a free quote and discuss your project and needs. We can also offer helpful tips and advice to help you get started with your own cabinet painting project.
Finish
Painting cabinets is a labor-intensive project that requires thorough prep work and multiple coats of paint for quality results. If done improperly, cabinets can be prone to chipping and peeling, especially in moisture-prone areas such as the kitchen. To avoid these issues, follow these steps to ensure a successful DIY cabinet painting project:
Step 1: Clean the surfaces with a degreaser like TSP or trisodium phosphate (TSP).
It is important to remove as much grease and grime from the surface of your cabinets as possible before starting the project. This will make sure that the new paint will adhere properly and protect your cabinets against moisture and mildew growth in the future.
Step 2: Sand the surfaces of your cabinets and doors with medium grit sandpaper to prepare them for priming. This will smooth out the rough texture and help your paint stick and look nice and professional. If you have a lot of dents, cracks, or chips on your cabinetry, be sure to patch them before continuing with the sanding process. You can use wood filler or spackle to patch any holes or imperfections.
Using a power sander makes this part of the job go much faster, but you can also do it by hand with folded sandpaper. If you are sanding laminate cabinets, you may need to use a sander specifically designed for this type of material.
Step 3: Prime the surfaces of your cabinetry with a mildew-resistant primer, such as KILZ 3(r) PREMIUM Primer. This will prevent any mold or mildew from growing on your newly painted cabinets and will help protect the finish from stains and water damage.
Once the primer has dried, you can begin with the actual painting. Choose a semi-gloss or gloss paint for your cabinetry to give it a fresh and clean look. Semi-gloss and gloss paint are very durable, easy to clean, and resist fading from sunlight exposure. They are a great choice for most kitchens.
Satin paint is another popular option for cabinetry because it is durable and looks nice in a wide variety of interior design styles. However, it is not as easy to wipe down and can show dust and fingerprints more easily than other finishes. If you are going with satin paint, be sure to use a high-quality sheen that will be resistant to staining and moisture.