Metal roofs are becoming increasingly popular for homeowners, as they last longer than traditional asphalt shingles and can make homes more energy-efficient. However, installing a metal roof requires the right tools and materials.
A good set of tin snips or duckbill vise grips is crucial to ensuring the longevity of your metal roof. These can crimp panel edges together or bend panels over sheathing or purlins.
Besides the roofing panels, you’ll need fasteners, clips, trim pieces, caulking, and sealants. The fasteners must be a special type designed to grip metal and to withstand expansion and contraction from temperature changes. Without this, water can seep past the joints and into your home. The caulking or sealant must be a formulation designed for use with metal and to flex with it.
The type of metal and panel style you choose will determine the materials needed for the project. Corrugated steel is the most common, available in a variety of colors and in both modular and standing seam panel options. It installs over sheathing or purlins and can be either through-fastened or clipped to the underlying supports. Modular metal is a more versatile choice that’s available in shingle-like styles and can be used in most climates. It also can be through-fastened or clipped to the roof deck. Standing-seam metal roofs are the more traditional looking option, but they require a skilled installation process and expensive tools to install. They can be field-seamed or snapped lock and installed over sheathing or on top of wood battens.
If you opt for a standing-seam metal roof, start with the highest point of your roof and work toward the eaves. Make sure each section is squared to the edge of your roof and extends the peak-to-eave distance by at least 3/4 in (1.9 cm). When you install the first panel, place it so that the small end overhangs the ridge by about 1 in (3.0 cm). This overlap will help to prevent rain and snow from blowing under the panel. Secure it with neoprene washer head screws spaced about 12 in (30 cm) apart down the length of the sheet. Be careful not to over-tighten the screws; a crooked screw won’t create a watertight seal.
Continue adding your metal panels, overlapping each by at least 3 to 4 in (7.6 to 10.2 cm). At the eaves and ridge, you can either through-fasten or clip them into the roof. A bead of silicone sealant can be laid between the overlapping ends to provide an additional waterproof layer.
Preparation
Metal roofing is making a comeback with home builders and homeowners who want to boost their home’s value by adding an energy-efficient roof. It is relatively expensive, but it will not need replacing as often as shingles or other roofing materials and can last a lifetime. It is important to consider the cost of installation and any other costs that may be associated with a new metal roof before you decide whether or not to go with this type of roofing.
Before installing the actual metal roof, you need to prepare your work area and obtain the necessary supplies. You should also find out about any permits or other requirements that might apply for your project. If you are not a licensed roofer, you may need to hire one for your metal roof installation project. Make sure that the roofer is familiar with your specific roofing material and has the appropriate insurance coverage for this type of project.
Once the preparation has been completed, it is time to begin the actual roof installation. It is important to follow the instructions provided by the manufacturer of your metal roof for this step, as this will ensure that your roof is installed correctly and will not leak. For example, if you are using a standing seam roof, it is important to follow the proper steps for fastening each sheet. This will prevent the screws from coming loose as the metal expands and contracts with changing temperatures.
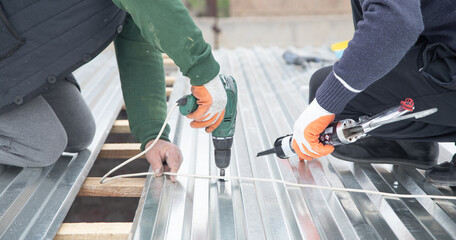
You should use a ladder when working on the roof, and wear safety goggles and gloves. It is also important to have a second person to help you if possible, as working on a roof can be dangerous. You should watch out for electrical wires, tree branches and other tripping hazards while you are working.
Once the panels have been installed, you will need to add a ridge cap and flashing to seal the joints. The ridge cap should lap evenly on both sides of the roof. To do this, you will need to mark where the ridge will sit on each panel by snapping a chalk line. You will then need to run a strip of sealant tape along the entire length of the ridge cap, as well as on each of the main ribs of the panels.
Installation
The installation process for a seamed metal roof requires careful planning and preparation. While it is possible for homeowners to complete the work themselves, it’s often easier to hire a roofing contractor to handle it. Professionals can make the project go faster, are familiar with building codes and will have warranty coverage if they need to repair something after installation. They can also help a homeowner determine the best financing option for their project.
Before installing any new panels, a high-temperature, waterproof underlayment should be applied to the entire roof deck. This is required by most building codes and protects the wood from water damage that could rust and weaken the metal roof. It also helps ensure that fasteners penetrate the underlayment rather than the wood and prevents water from seeping past the seams.
Once the underlayment has been installed, the drip edge should be added and a closure strip placed over it. The drip edge should overlap the edging of the first panel by 1/2 to 3/4 inch and be square to the roof line. Sealant tape should be added over the drip edge and down the center of the closure strip to provide a watertight seal.
Depending on the roof, a vented or solid ridge cap will be needed to finish the look of the roof. It’s important to note that the ridge cap will lap both sides of the roof evenly so it doesn’t sit too far up on one side or down on another. Mark the panels where the ridge will rest by snapping a chalk line.
Next, run a strip of the roofing manufacturer’s recommended sealant tape up along the ridge and over the closure strip. Finally, add the ridge cap and fasten it to the roof using the recommended screws.
The installation of a metal roof can be difficult, especially for those who are unfamiliar with the process or don’t have all the right tools. However, if the proper materials and safety equipment are used, this is a project that even DIYers can accomplish. A metal roof will last longer than asphalt shingles and can make a home more energy-efficient, so it’s worth the extra effort.
Maintenance
Metal roofs are relatively low-maintenance, especially compared to other roofing materials. However, this doesn’t mean that they don’t require regular maintenance. For the best results, hire a professional roof contractor to perform a general look-over each year. This helps keep rust spots at bay and prevents water leaks from forming in your home.
In addition to checking for rust, the professional will look at the underlayment and fasteners. These will need to be tightened, and a new sealant may be required in some areas. Typically, a polyurethane sealant will work well. Avoid tubes of silicone from your local home center, as they will not last on a metal roof. Instead, invest in a high-temperature sealant designed to adhere and flex with the metal roof.
The installers will also need to clear an area for material storage, vehicle parking, and a dumpster, if needed. They will need a stable ladder to work from, and they should always be working with a partner to ensure safety. In addition, the team will need access to power for cutting and fastening tools. It’s a good idea to provide multiple outlets and a generator for the team.
After a metal roof installation, you’ll enjoy an energy-efficient home and a higher resale value. You’ll also have the peace of mind knowing that your home is protected from leaks, mold, and power spikes.
One of the biggest factors in determining your roofing needs is the climate where you live. Extreme weather conditions like hail and heavy rain can wear down a metal roof. Likewise, if you’re living in an area with frequent snowstorms, your roofing will need to be durable enough to handle the added weight.
Unlike asphalt shingles, metal roofs are more durable in harsh weather. You’ll still need to clean your roof, but you won’t have to worry about scuffing, scratching, or flaking. In fact, the metal will actually improve its appearance with age, as it oxidizes and develops a more natural color. Just don’t walk on the roof without proper footwear, and make sure to clean up any metal shavings or burrs right away.